Blogs & News
We have a lot of ideas and know-how about bags, material sourcing, sampling, production and a whole host of bag-related topics that we would like to share with you.
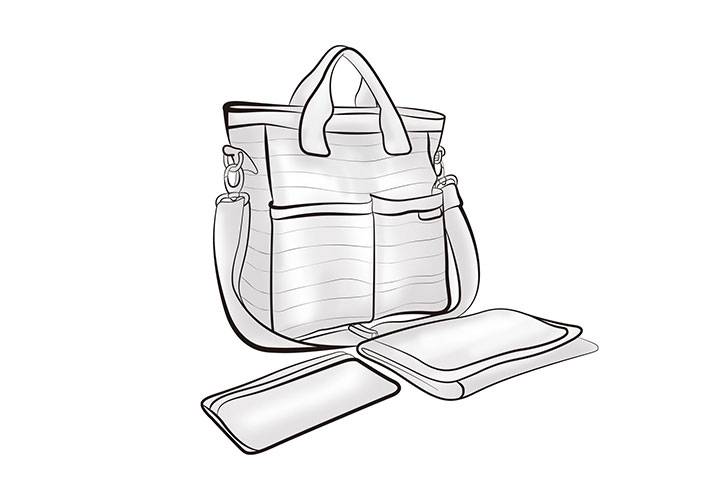
Basic Tutorial on Handmade Leathercraft: Learn to Make Handmade Leather Bags from Scratch
In today’s fast-paced modern life, handmade leathercraft, with its unique charm, is attracting more and more people. Making a handmade leather bag by yourself can not only show your personal creativity and unique taste but also bring a sense of full accomplishment. If you are also interested in making handmade leather bags, then follow this basic tutorial and learn to make handmade leather bags from nothing.
Handmade leathercraft has a long historical background. In ancient times, leather products were favored because of their durability and unique texture. From the ancient times when people used simple leather to cover their bodies and keep warm, to later, as the craftsmanship continuously advanced, leather was made into various exquisite items such as saddles, armors, and bags. In the long river of history, handmade leathercraft has inherited human wisdom and creativity. Craftsmen, with their exquisite skills, turn ordinary pieces of leather into masterpieces that combine practicality and artistry.
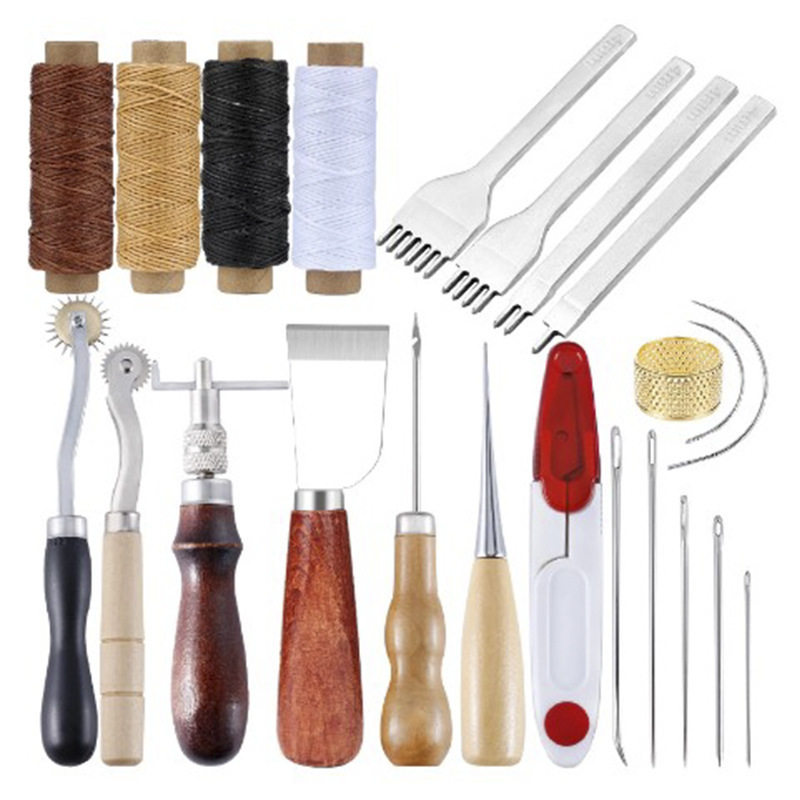
Prepare Tools and Materials
1.Tools:
– Leather cutting knife: Used for cutting leather. When using it, keep the blade sharp to ensure a neat cutting edge. Place the leather flat on a cutting mat and use a ruler to assist in carefully cutting the leather along the designed lines.
– Scissors: Used to assist in cutting fabric and other accessories. Choose sharp scissors to easily cut various accessories.
– Pricking iron: A punching tool. Place the leather on a flat surface, use a spacing gauge to determine the punching position, and then tap the pricking iron vertically to make uniform holes.
– Edge beveler: Used to process the edges of leather. Hold the edge beveler and slide it along the edge of the leather at an appropriate angle to shave off the excess part and make the edge smoother.
– Sanding stick: Used to sand the edges of leather. After beveling, use the sanding stick to gently rub the edges of the leather to further smooth them.
– Rubber mallet: Used in conjunction with the pricking iron. When using the pricking iron to punch holes, gently tap the pricking iron with a rubber mallet to make it penetrate the leather smoothly while avoiding excessive damage to the leather.
– Hand sewing needle: Specifically used for sewing leather. Choose a hand sewing needle suitable for the thickness of the leather, thread waxed thread through the eye of the needle, and start sewing.
– Waxed thread: A strong sewing thread. Choose the appropriate waxed thread according to the color of the leather and personal preference to ensure the quality and strength of the thread.
– Spacing gauge: Used to measure the punching spacing. Adjust the spacing of the spacing gauge to adapt to different leather thicknesses and design requirements.
– Ruler: Used to measure dimensions. Used to accurately measure the dimensions of leather and various parts to ensure the accurate size of the made leather bag.
– Curved needle: Used for sewing in special parts. In some hard-to-reach parts such as corners or curves, use a curved needle for sewing.
– Gluing film: Used to stick leather after applying glue. Evenly apply glue on the gluing film, then stick the leather together and press it to make it firmly bonded.
– Glue: Special glue for leather. Choose good-quality special glue for leather to ensure a firm bond.
– Awl: Used to assist in punching and positioning. Before punching holes, you can use an awl to mark the position on the leather for accurate punching.
2.Materials:
– Leather: Choose your favorite leather type and color, and at the same time, pay attention to the appropriate thickness to meet the needs of making a leather bag.
– Lining fabric: Adds beauty and protection to the inside of the leather bag.
– Hardware accessories: Such as zippers, buckles, magnetic snaps, etc., to enhance the functionality and beauty of the leather bag.
– Edge paint: Effectively prevents the edges of leather from wearing.
– Dye or pigment (optional): Can be used to color the leather to show individuality.
– Interlining (optional): Increases the stiffness of the leather bag.
Design and Cutting
- First, according to your own needs and preferences, design the style and size of the leather bag. You can draw a sketch on paper and clearly mark the dimensions of each part.
- Place the designed sketch on the leather and use a ruler and a leather cutting knife or scissors to cut the leather into the corresponding shape. During the cutting process, ensure accurate dimensions and try to make the edges neat and smooth.
Punching and Sewing
- Use a spacing gauge and a pricking iron to punch holes in the parts of the leather that need to be sewn. Keep the spacing between the punched holes should be kept uniform. According to the thickness of the leather and personal preference, choose the appropriate specification of the pricking iron.
- Thread the waxed thread through the hand sewing needle and start sewing the leather. When sewing, you can use the double-needle sewing method or other suitable sewing methods. Pay attention to keeping the tension of the thread moderate to ensure neat and beautiful sewing.
Processing the Edges
- Use the edge beveler to shave the edges of the leather thinner to make them smoother and more delicate.
- Apply edge paint to make the edges more durable and beautiful. You can apply multiple layers of edge paint and wait for each layer to dry before applying the next layer.
Installing Hardware Accessories and Lining Fabric
- According to the design of the leather bag, install hardware accessories such as zippers, buckles, etc. Ensure accurate positioning and firm installation when installing. You can use tools such as screwdrivers and pliers to assist in installation. For zippers, align them with the edges of the leather and fix them with thread or glue. Buckles and magnetic snaps need to be installed correctly according to their types to ensure smooth opening and closing.
- Cut the lining fabric into the appropriate size and fix it inside the leather bag by gluing or sewing. The choice of lining fabric should match the overall style of the leather bag. At the same time, pay attention to its quality and durability. If you choose to sew the lining fabric, you can use thread of a similar color to the leather to maintain the overall beauty.
Final Finishing and Adjustment
- Carefully check all parts of the leather bag. If necessary, you can perform further polishing and finishing. Check whether the edges are smooth, whether the sewing is neat, and whether the hardware accessories are firm. For imperfect places, you can gently polish with sandpaper or repair with thread.
- Adjust the shape and size of the leather bag to make it more perfect. You can fill some soft materials such as cotton or foam inside the leather bag to help it maintain its shape. At the same time, check whether the length of the shoulder strap of the leather bag is appropriate and whether it needs to be adjusted.
Through the above steps, a handmade leather bag is completed. During the production process, be patient and meticulous and keep trying and improving. I believe you will be able to make your own unique handmade leather bag. Handmade leathercraft is not only a skill but also an attitude towards life. Let’s immerse ourselves in the fun of handmade production!